
Table of Contents
Creating a Layers of the Earth DIY MDF Kit for Kids: An Engaging STEM Education Experience
In today’s fast-paced world, it is essential to provide children with educational and engaging activities that promote their overall development. STEM education, which stands for Science, Technology, Engineering, and Mathematics, has become increasingly popular as it prepares children for the challenges of the future. One fun and informative activity that incorporates STEM education is the creation of a Layers of the Earth DIY MDF kit. This project not only helps children understand the Earth’s structure but also encourages their creativity and problem-solving skills. In this article, we will discuss the benefits of STEM education, the materials required for the project, and step-by-step instructions on how to create your own Layers of the Earth DIY MDF kit.
Materials Required for the Layers of the Earth DIY MDF Kit
To create your own Layers of the Earth MDF kit, you will need the following materials:
Materials Required for the Layers of the Earth DIY MDF Kit
To create your own Layers of the Earth MDF kit, you will need the following materials:
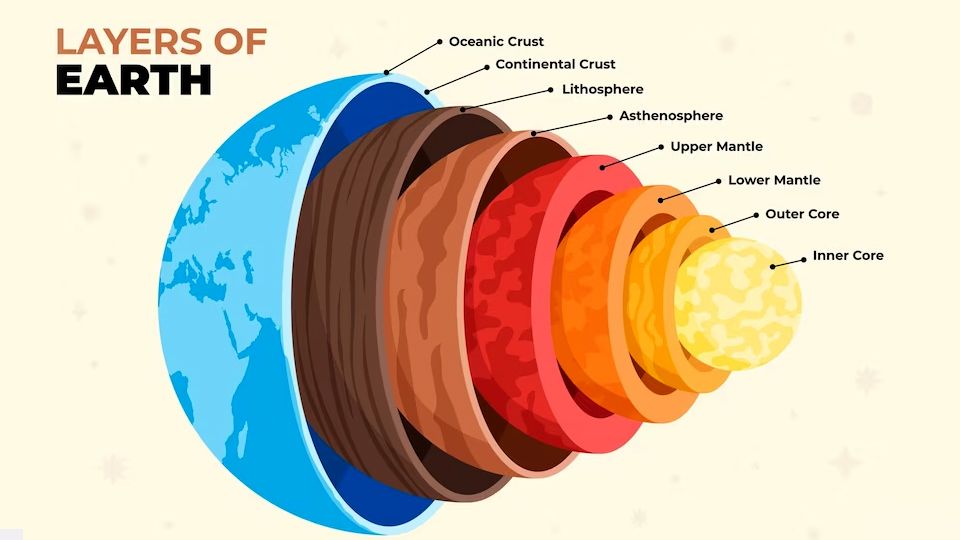
- • MDF (Medium Density Fiberboard) pieces in different sizes and colors representing the Earth’s layers (crust, mantle, outer core, and inner core)
- • Acrylic paint or colored markers
- • Glue or adhesive
- • Sandpaper
- • A saw or cutting tool
- • A ruler or measuring tape
- • A pencil or marker for marking the MDF pieces
Step-by-Step Instructions to Create the Layers of the Earth DIY MDF Kit
Follow these steps to create your own Layers of the Earth MDF kit:
Step 1: Research and Planning
Before you begin, it is essential to research the Earth’s layers and their properties. This will help you decide on the appropriate colors and sizes for the MDF pieces. Plan the design and layout of your project, keeping in mind the sizes and shapes of the MDF pieces required.
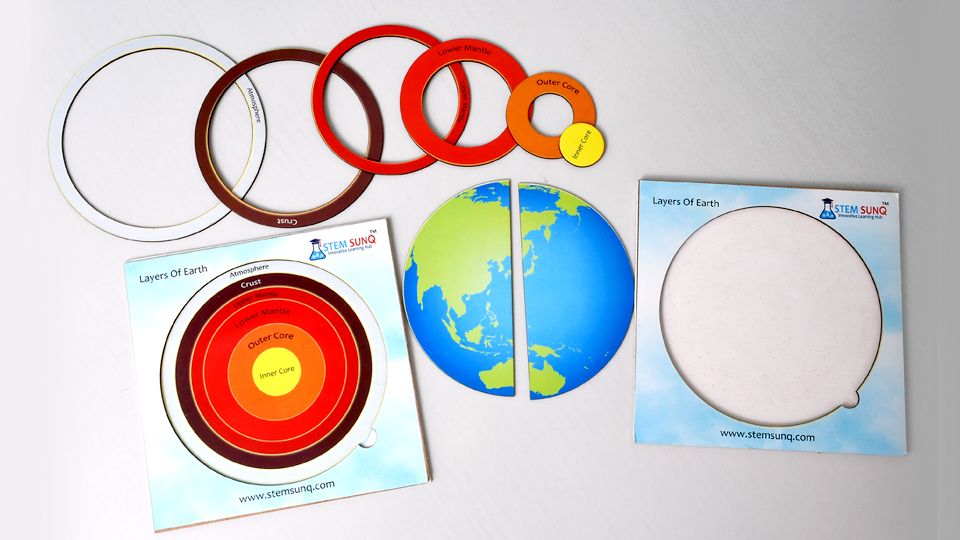
Step 2: Cutting the MDF Pieces
Using a saw or cutting tool, cut the MDF pieces according to your design. Ensure that you have different sizes and shapes to represent the Earth’s layers. Use sandpaper to smooth the edges of the MDF pieces.
Step 3: Painting or Coloring the MDF Pieces
Paint or color the MDF pieces to represent the Earth’s layers. You can use acrylic paint or colored markers for this step. Allow the paint to dry completely before moving on to the next step.
Step 4: Assembling the Layers of the Earth MDF Kit
Once the paint has dried, assemble the MDF pieces to create the Layers of the Earth model. Start with the inner core and work your way outwards to the crust. Use glue or adhesive to secure the pieces together.
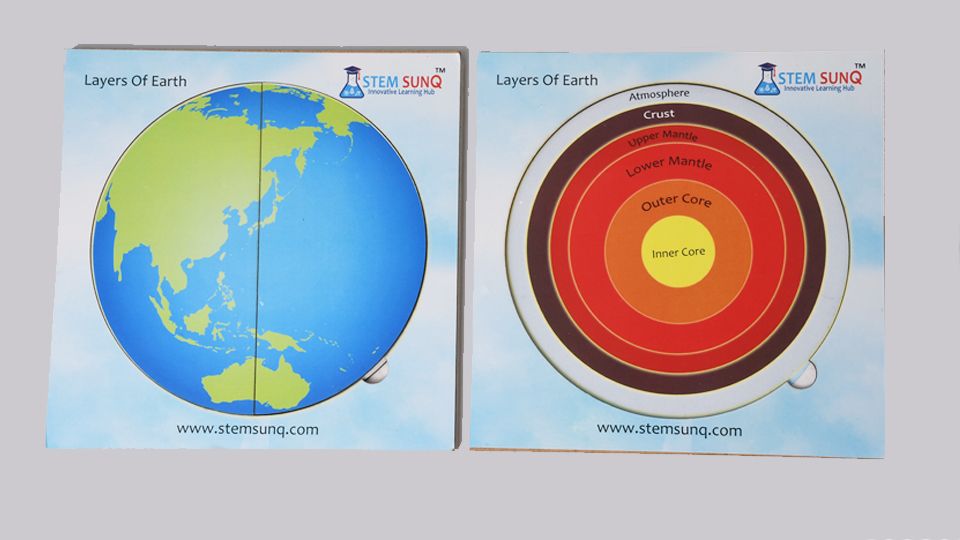
Step 5: Labeling the Earth’s Layers
Label the Earth’s layers using a marker or adhesive label. This will help children identify the different layers and learn about their properties.
Step 6: Adding Additional Information (STEM SUNQ)
To enhance the educational value of your Layers of the Earth MDF kit, consider adding additional information about the Earth’s layers, such as their composition, temperature, and depth. This can be done by creating small information cards or labels and attaching them to the model.
Conclusion
Creating a Layers of the Earth DIY MDF kit is a fun and educational activity that incorporates STEM education. By following the step-by-step instructions provided in this article, you can create your own Layers of the Earth model and help children develop essential skills while learning about our planet’s structure. Additionally, incorporating STEM kits like the Layers of the Earth MDF kit in STEM education can further enhance children’s learning experiences and prepare them for future success.